Slaying the Video Dragon
No, I’m not talking about grouping up to hunt world dragons in Azeroth, I’m talking about something much more intimidating: uploading videos into ANGEL. More specifically, uploading segments of movies or instructional videos.
I have helped a lot of people upload video segments into ANGEL and I thought I’d share a bit of my thought process when I’m doing so. I’ll also briefly explain what settings I like to use, and why I chose them.
I almost always start by asking myself some questions:
What is the source of the video? The most common instance is that I am given a DVD containing videos to upload. To get the video off of the DVD, it needs to be ripped to a computer hard disk. What’s nice about having the DVD is the ability to turn on subtitles and capture them for the purpose of accessibility. Of course, if the video is already a file on a computer, then this step can be skipped.
How big is the video going to be? In some cases size can dictate the quality of a video. If the instructor would like a forty-minute segment uploaded, some quality might have to be sacrificed.
What devices are going to be used to view this video? As you are probably aware, the iPad will be distributed to students and faculty next year. Adding a new device can change the way videos need to be encoded. For example, Windows Media Video (.WMV) files may not play on the iPad.
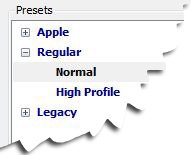
Once I’ve answered these questions, my usual process is to rip the DVD video to hard disk by using the program Handbrake, which is a terrific (and free) program that I highly recommend. What I prefer to do is rip a high quality version (using the “Normal” profile under the “Regular” preset, if you’re following with Handbrake open), which I will then use to make compressed versions with Adobe Media Encoder. It is handy to have the high quality version in case I need to change some encoding settings.
Adobe Media Encoder is installed on BVU’s laptops and is a great tool for compressing video. I have a custom preset saved in Media Encoder to make things go more quickly. Since most of the videos I’ve put into ANGEL have an aspect ratio of 4:3, which is a common non-widescreen format, I use the following settings (for those following along at home):
Audio
Codec: AAC
Output Channels: Stereo
Frequency: 44.1kHz
Audio Quality: High
Bitrate: 96 kbpsVideo
Format: H.264
Preset: Custom
Frame Size: NTSC, 320 pixels x 240 pixels
Frame Rate: 29.97
Bitrate Encoding: 2 Pass encoding with target bitrate set to approximately .5 Mbps. The maximum bitrate can be set to the same number or slightly larger.
I believe we should have a high standard for the media in our courses, so I like to use stereo sound and a minimum video bitrate of .5 Mbps. The audio bitrate of 96 kbps is not earth-shattering, but it’s most likely going to pleasant to listen to, especially if you have a lot of videos to watch. Like I mentioned before, if the video is going to be a long one, the video bitrate may have to be lowered. Media Encoder has a handy feature in that it estimates the file size of the video you are making, so you can play around with the bitrate setting to get an idea of how big it will be.
Using the settings above will result in a video size of about 4.5MB per minute, so a 3 minute video would be around 13MB. With today’s bandwidth, large video sizes are becoming less of a problem. However, that doesn’t mean it’s a good idea to throw up a 500MB feature-length movie. That’s when streaming, like how Netflix delivers movies, comes in…which is another topic altogether.
We decided to use the H.264 codec for our videos because it looked to be the go-to codec for future development on the internet and it is friendly to mobile devices. And being a higher education institution, we can use the H.264 codec royalty-free.
Hopefully this sheds some light on the subject of video in ANGEL. As usual, if you have any questions about a blog post, or you’d like to know more, feel free to contact the TLTC or stop by!


Reply